Report settings wizard


|
Report settings wizard |
|
|
You can start this wizard by pressing the Report Settings button on the Printing page of Modeler options. The settings selected here will be used as default values in all reports available in the Print/Report menu.
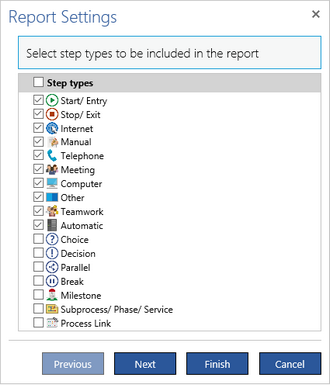
You can use the first page of the wizard to select step types that will be included in the report. Initially Start/Entry, Stop/Exit and all activities are selected. Select the step types to be reported in the process report. Then, press Next.
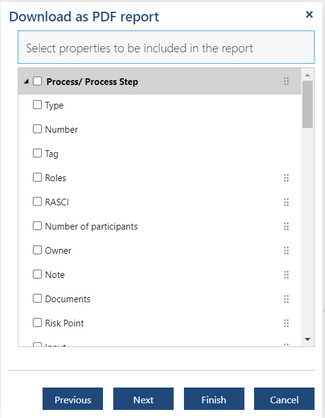
Select the process and process step Properties you want to be reported in the process report. You can also select process Statistics there if you want to include them in the report. You can decide on the order the properties will appear in the report. Put your cursor over the drag handle (six dots) on the right hand side of the property name and drag it up or down to the required position. You can only reorder properties within one category but you can also reorder the whole categories. Type, Number and Tag properties cannot be reordered since they compose the header for the process step together with the Name. Sub-properties (like Processing time per custom type) cannot be reordered either.
Press the Next button to continue with the wizard.
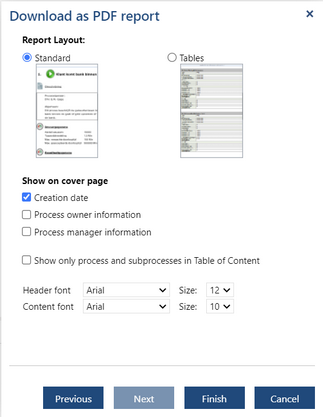
Choose the Report layout for the generated report. In the Tables layout, all the properties will be put into one big table. If the Standard layout is select then the resulting report uses pictograms to mark properties or groups of properties (see the example below). Check Creation dateto put the today's date on the cover page Check Process owner information to put the content of the Process Owner property of the process on the cover page. Check Process manager information to put the content of the Process manager property of the process on the cover page. Check the Show only process and subprocesses in Table of Content if you want to simplify the table of content (otherwise all process steps will be also in the Table of content). Select the required Header- and Content Font and Size. Press Finish to close the Report settings wizard.
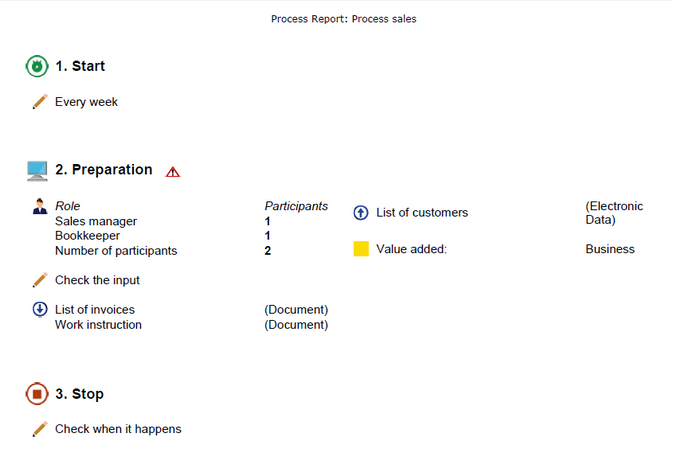
The resulting Standard report will look like in the following example:
|